The Ultimate Handstand Push Up Progression Guide

Handstand push-ups are an incredible exercise that combines strength, balance, and control. This exercise activity incorporates the benefits of handstands and push-ups, targeting not just your shoulders and triceps but also engaging your core, offering an overall upper-body workout. Mastering handstand push-ups, on the other hand, requires mindful progression and dedication. We’ll bring you through a detailed step-by-step process in this guide to help you achieve this handstand push-up (HSPU).
Understanding Handstand Push-Ups
Handstand push-ups are the ultimate in bodyweight training. They work your upper body in ways that standard push-ups do not. This exercise primarily works your deltoids, triceps, and upper chest, while additionally engaging your core muscles to keep you balanced.
Aside from the physical benefits, handstand push-ups improve body awareness and spatial awareness. They demand you to manage your body while inverted, which improves your sense of balance and coordination.
Building the Foundations
Before starting your handstand push-up journey, be sure you have a strong foundation of strength and stability. Upper body strength, particularly in the shoulders and triceps, core stability, and handstand experience are required.
Push-up variations will help you strengthen your shoulders and triceps, while planks and other abdominal workouts will help you engage your core. Handstands practiced against a wall will help you adjust to the inverted position and build the essential balance.
1. Upper Body Strengthening
Incorporate push-up variations into your routine. Begin with regular push-ups, then progress to diamond push-ups, and finally, focus on pike push-ups to simulate the motion of handstand push-ups.
- Sets: Start with 3 sets of 10-15 repetitions for each variation.
- Rest: Rest for 60-90 seconds between sets.
2. Core Engagement
Develop core stability through exercises like planks, hollow holds, and leg raises.
- Planks: Perform 3 sets of planks, holding for 45-60 seconds each.
- Rest: Rest for 45 seconds between sets.
3. Handstand Practice
Familiarize yourself with the handstand position by practicing against a wall. Focus on aligning your body and finding balance.
- Practice Time: Aim for 10-15 minutes of practice in each session.
Also read: How to do handstand
Step-by-Step Handstand Push-Up Progression Guide
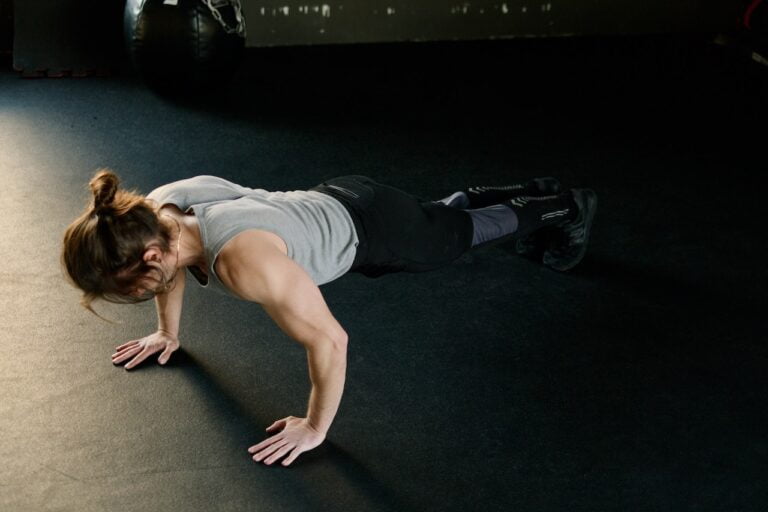
1. Pike Push-Ups:
- Assume a push-up position with your hips raised, forming an inverted V shape.
- Lower your head towards the ground, then push back up.
- Sets: Perform 4 sets of 10-15 repetitions.
- Rest: Rest for 60-75 seconds between sets.
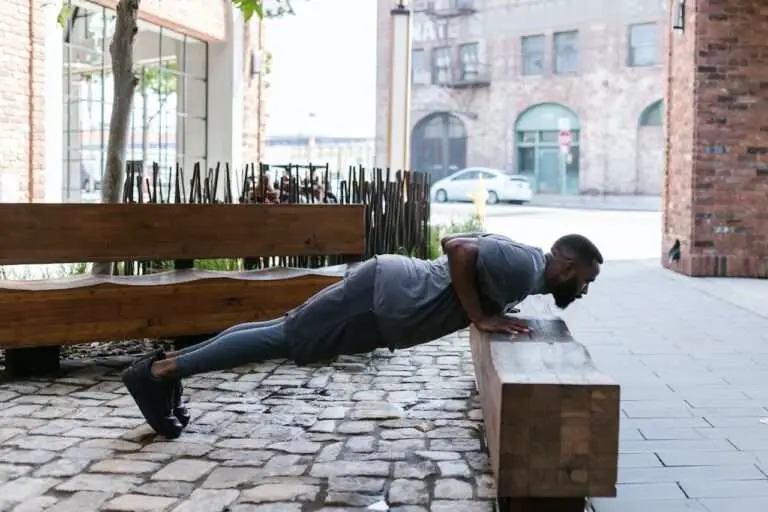
2. Elevated Pike Push-Ups:
- Place your feet on an elevated surface to increase the range of motion.
- Perform push-ups in the pike position, focusing on maintaining form.
- Sets: Complete 4 sets of 10-12 repetitions.
- Rest: Rest for 60 seconds between sets.
3. Wall-Assisted Handstand Push-Ups:
- Place your hands slightly wider than shoulder-width against a wall.
- Kick up into a handstand against the wall.
- Perform controlled partial push-ups, lowering your head toward the ground and pushing back up.
- Sets: Start with 3 sets of 6-8 repetitions.
- Rest: Rest for 90 seconds between sets.
4. Frogstand Push-Ups:
- Transition into a frog stand position with your knees on your elbows.
- Lower your head towards the ground and press back up.
- Sets: Aim for 3 sets of 6-8 repetitions.
- Rest: Rest for 45-60 seconds between sets.
5. Wall-Assisted Handstand Negative Push-Ups:
- Kick up into a handstand against the wall.
- Slowly lower yourself into a headstand position, emphasizing control.
- Sets: Complete 3 sets of 5-6 repetitions.
- Rest: Rest for 75 seconds between sets.
6. Freestanding Handstand Push-Ups:
- Kick up into a freestanding handstand.
- Lower yourself with control into a push-up position and push back up.
- Sets: As you progress, aim for 3 sets of 4-6 repetitions.
- Rest: Rest for 2-3 minutes between sets.
Also Read: How to do one arm handstand
Common Mistakes and How to Avoid Them: Ensuring Proper Form
It is common to make mistakes during the way that can slow your progress or end up resulting in injuries. These include improper alignment, overarching your back, and a lack of control during the descent. To avoid these issues:
Arching the Back:
- Mistake: Allowing your lower back to sag during the movement.
- Solution: Engage your core muscles and maintain a straight line from head to heels. Imagine a plank position to keep your spine aligned.
Elbow Flaring:
- Mistake: Letting your elbows flare outwards during the descent.
- Solution: Keep your elbows pointing slightly back and close to your body to engage the triceps and protect your shoulders.
Rushing the Descent:
- Mistake: Dropping down too quickly during the negative phase.
- Solution: Control the descent, taking at least 3-4 seconds to lower yourself. This eccentric phase builds strength effectively.
Neglecting Shoulder Mobility:
- Mistake: Attempting handstand push-ups without sufficient shoulder mobility.
- Solution: Prioritize shoulder mobility exercises like arm circles and shoulder stretches in your warm-up routine.
Losing Balance:
- Mistake: Struggling to maintain balance during the movement.
- Solution: Practice against a wall until you develop stability. As you progress, work on freestanding handstands to enhance balance control.
Incorporating Handstand Push-Ups into Your Routine
Integrate handstand push-ups into your training routine based on your goals. For overall strength and development:
- Frequency: Train handstand push-ups twice a week.
- Routine: Combine them with other upper body exercises and allow a day of rest between sessions.
Warming Up and Using Spotters
Before attempting handstand push-ups, ensure you’re adequately warmed up. Perform shoulder mobility exercises, wrist stretches, and light cardio to increase blood flow to your muscles. Additionally, if you’re new to handstands, having a spotter or using a padded surface can provide extra safety.
Tracking Progress and Setting Goals
Keep a record of your progress to track improvements. Gradually increase the repetitions and sets as you grow stronger. Set short-term goals for each phase and long-term goals for achieving freestanding handstand push-ups.
Conclusion
Mastering handstand push-ups is a remarkable achievement that demands patience, persistence, and dedication. The journey itself offers immense rewards beyond just physical strength – improved balance, body control, and a sense of accomplishment. Remember that progression is the key. By following this comprehensive guide and embracing the challenge step by step, you’ll pave the way toward conquering the ultimate upper body exercise: the handstand push-up.
FAQs
1. How long does it take to learn handstand push-ups?
The time to master handstand push-ups varies based on individual fitness levels, dedication, and consistency. Typically, it takes several months of progressive training to achieve proficiency.
2. How many handstand push-ups should I do a day?
Start with an achievable number, such as 3 sets of 5-6 reps, and gradually increase as your strength improves. Listen to your body and avoid overtraining.
3. How many sets of handstand push-ups should I do?
It’s recommended to begin with 3-4 sets of handstand push-ups in your routine. Adjust the sets based on your fitness goals and recovery ability.
4. Can I learn to handstand in 3 weeks?
While significant progress is possible in 3 weeks, mastering handstands and handstand push-ups usually requires more time due to the complexity of the movement and the need to build strength and balance.
5. What level of difficulty is a handstand?
Handstands are considered an intermediate to advanced bodyweight exercise. They require core strength, shoulder stability, and balance. Progression and practice are essential to achieve a stable freestanding handstand and handstand push-ups.