Mastering the Handstand: A Step-by-Step Progression

When you watched someone effortlessly balance on their hands in a handstand, you might have wondered how they do it. Well, you’re in luck because we’re going to break down the whole process of learning to do a handstand in easy and simple steps with these handstand progression guide.
The handstand is one of the exercises that best demonstrate strength, balance, and control in the area of fitness and bodyweight training. This age-old skill not only shows physical capability but also requires patience and mental focus. However, mastering a handstand needs an organized process that leads people from their first attempts to an at-ease, in-control handstand position. We will go over the difficulties of handstand progress in this in-depth guide, breaking the steps, techniques, and tips required to achieve this outstanding skill.
Understanding the Handstand
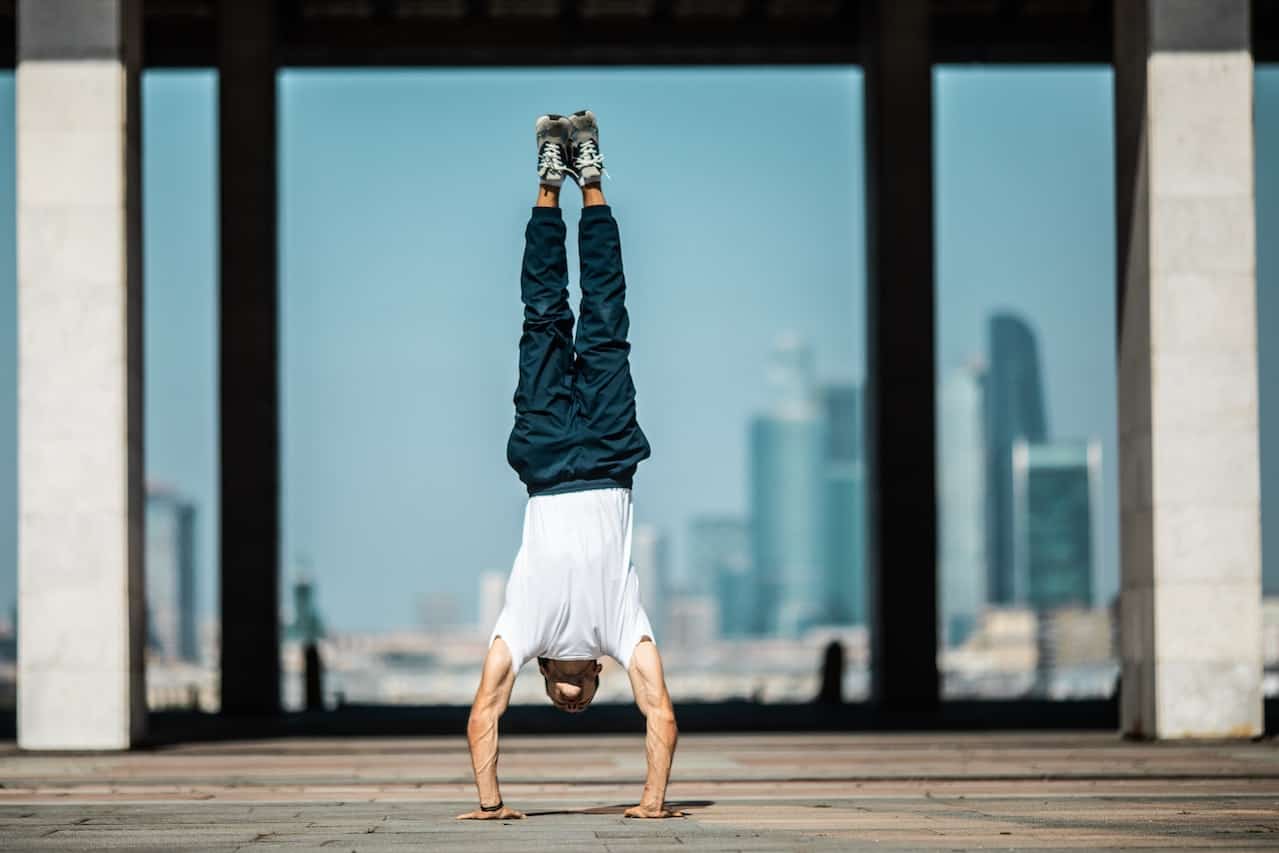
Before going into the progression, it’s important to understand what is a handstand. A handstand is a gymnastic posture where the body is inverted and supported solely by the hands, with the legs extended vertically above the head. It requires a combination of upper body strength, core stability, flexibility, and proprioception.
what muscles do handstands work?
Handstands aren’t just about balancing; they’re a full-body workout! Here’s a list of the muscles that worked in handstand skill:
- Shoulders: Your deltoids, which are the muscles on the tops of your shoulders, work hard to stabilize your body in the inverted position.
- Arms: The triceps and biceps in your arms play a crucial role in supporting your weight and controlling movement.
- Core: Your entire core – including the rectus abdominis (abs), obliques, and transverse abdominis – engages to keep your body straight and balanced.
- Back: The muscles in your upper and lower back, such as the erector spine, help maintain your posture and prevent over-arching.
- Legs: While they might seem less involved, the muscles in your legs, especially the hip flexors and quadriceps, contribute to maintaining a stable position.
- Wrist Flexors and Extensors: These muscles in your forearms help control your wrist movements and provide stability to your hands.
Handstand progression
1. Building Foundational Strength
The journey towards mastering handstands begins with establishing a solid foundation of upper body and core strength. A strong upper body, especially in the shoulders, core, arms, and wrists, is essential for supporting the body’s weight in an inverted position. Before you start handstand, let’s make sure your body is prepared for the challenge.
Push-Ups:
Start with regular push-ups to build shoulder and arm strength. As you progress, consider variations like diamond push-ups and pike push-ups to target specific muscle groups needed for handstands.
Try doing 3 sets of 10 reps to start.
Planks:
Perform various plank variations to strengthen your core muscles, which play a crucial role in maintaining balance during a handstand. Just lie on the ground facing down, put your elbows under your shoulders, and lift your body off the ground. Hold for 30-60 seconds, rest, and repeat 3 times.
Happy Wrists, Happy Handstands:
Your wrists need love too. Gently move your wrists in circles and stretch them by pushing your palms against a wall. This will help them feel comfy during handstands.
Also read: How to do handstand pushups
2. Developing Body Awareness and Alignment
Handstands require a keen sense of body awareness and proper alignment. These elements lay the foundation for a successful progression.
Pike Hold:
Begin in a push-up position, with your hands placed slightly wider than shoulder-width apart and your feet hip-width apart. Lift your hips upward while keeping your legs and arms straight. Your body should form an inverted “V” shape.
Wall Plank Holds:
Begin by practicing wall plank holds, where your body is parallel to the wall, and your feet rest on it. This helps you get accustomed to the sensation of being upside down while offering support.
Hollow Body Holds:
Mastering the hollow body position is essential for maintaining a straight line from head to toes during a handstand. Practice hollow body holds on the ground to familiarize yourself with this posture.
3. kick up to handstand
One of the most challenging aspects of handstand progression is learning how to kick up into the position smoothly and with control. The kick-up technique is a fundamental skill for entering a handstand gracefully.
Wall-Assisted Kick-Ups:
Stand facing the wall with your hands placed slightly closer than shoulder-width. Your fingertips should be about a hand’s length away from the wall. Swing one leg up, simultaneously kicking off the other. The kicking leg’s momentum should carry you into the handstand position. Focus on finding the balance point over your hands. Adjust your hand placement and core engagement to maintain stability.
Partner Spotting:
Having a partner assist you during kick-ups can provide the necessary support and feedback as you refine your technique. They can guide your legs and provide balance assistance.
4. Finding Balance and Stability
Balance is key, and we’ve got some cool exercises to help you with that.
Frog Stand:
The frog stand, or crow pose, is a precursor to the handstand that allows you to practice balancing on your hands with your feet off the ground. This exercise encourages a better understanding of weight distribution.
Wall assist handstand:
Use the support of wall and try to find the balance. Try Chest to wall handstand for better result. Hold this position for about 60 seconds.
Falling and Bail-Outs:
Learning how to safely exit a handstand is an integral part of the progression. Practice controlled bail-outs to prevent injury and build confidence.
5. Freestanding Handstands
As you become more comfortable with the handstand position against the wall, it’s time to transition to freestanding handstands. This stage requires patience and consistent practice.
Balancing Away from the Wall:
By constantly doing freestanding handstands, you can gradually reduce your dependence on the wall. To maintain balance, concentrate on using your fingers and core.
Spotting and Alignment Checks:
Use a mirror to check your alignment or ask a friend to help you observe yourself. You can improve your technique by immediately correcting minor asymmetries.
Also read: How to do one arm handstand
6. Refining Technique and Progressing Further
With consistent practice, you’ll start to develop a sense of balance and control in your freestanding handstands.
Handstand Walking:
Once you’re comfortable in a stationary handstand, challenge yourself with handstand walking. This involves shifting your weight between your hands to move in different directions.
Straddle and Pike Variations:
Experiment with straddle and pike variations to enhance your control and balance. These variations introduce complexity by altering your body’s center of gravity.
Press to Handstand: Mastering the Elegance
The press to handstand is a graceful way to transition from a seated position to a perfectly balanced handstand. It showcases not only strength but also body control and fluidity. The progression involves three main variations: the tuck, straddle, and pike press.
- Tuck Press: Begin by sitting on the ground, tucking your knees to your chest, and pressing your hands into the floor. Engage your core as you slowly lift your hips and legs overhead, extending into a handstand position.
- Straddle Press: From a seated position, spread your legs wide into a straddle. Place your hands on the ground and lean forward, shifting your weight onto your hands. With controlled strength, lift your legs off the ground, extending into a straddle handstand.
- Pike Press: Sit with your legs extended in front of you. Place your hands on the ground and hinge at your hips, lifting your legs vertically into the air. This variation requires significant flexibility in the hamstrings and shoulders.
Mindset and Practice
Your mind is a powerful tool. Keep these tips in mind as you practice:
Practice Makes Progress:
Rome wasn’t built in a day, and neither is a perfect handstand. Practice a little bit each day to get better.
Mindfulness and Breathing:
Handstands require mental focus and control. Practice deep, rhythmic breathing to stay calm and centered while inverted.
Mindset Shift:
Instead of fixating solely on the final handstand position, celebrate each small achievement along the way. Every second of balance and every controlled kick-up is a step forward.
Conclusion
The journey to mastering handstand is a rewarding one that requires dedication, patience, and a willingness to push yourself beyond your comfort zone. You’ll discover not just physical abilities but also a profound sense of success as you progress through each stage of gaining basic strength, body awareness, perfecting kick-ups, finding balance, transitioning to freestanding handstands, and refining technique. Remember that every mistake, fall, and successful hold contributes to your growth. In order to master the handstand, accept the challenge, be persistent, and enjoy the feeling of defying gravity.
FAQs
1. How do I start practising handstands if I’m a beginner?
- Begin with wall-facing handstands to develop balance and alignment.
- Practice kick-up drills and gradually shift weight from the wall for freestanding attempts.
2. What muscles do handstands work?
- Handstands engage shoulders, core, forearms, and stabilizers for balanced strength development.
3. How can I hold a handstand for a longer duration?
- Focus on proper alignment and core engagement.
- Practice controlled breathing and gradually increase hold times.
4. Can I use a wall to help with handstand practice?
- Yes, wall handstand progressions build confidence and strength.
- Start with wall-facing holds and progress to alternating leg lifts.
5. What’s the key to kicking up into a handstand successfully?
- Position hands close to a wall for support.
- Use controlled leg swing and kick-up motion while engaging core muscles.
6. How can I fix arching my back during a handstand?
- Focus on core engagement to prevent over-arching.
- Ensure your body forms a straight line from wrists to ankles.
7. Are handstands suitable for all fitness levels?
- Handstands can be adapted for various fitness levels.
- Beginners should start with basic progressions and gradually advance.
8. Can I achieve a one-arm handstand with proper practice?
- Yes, but it requires exceptional strength, balance, and dedication.
- Master freestanding handstands before attempting advanced variations.
9. What’s the importance of consistent handstand practice?
- Consistency builds muscle memory and enhances balance.
- Regular practice is essential for mastering technique and progressing.
10. Are there any safety precautions for handstand practice?
- Always practice in a clear space with a soft surface.
- Consider using a spotter or practicing near a wall for safety.


